
Managing recording files
How to manage your recordings
Saving, loading, exporting, importing recordings
All management of the recordings is done via the control panel. Let's create our first recording
In the Settings section of the Control Panel, ensure Record Live Captures is enabled.
Connect your device, refresh and press the record button.
You can leave recording on all the time but you will get a new recording every time you stop / start. You can delete unwanted recordings (see later on this page)
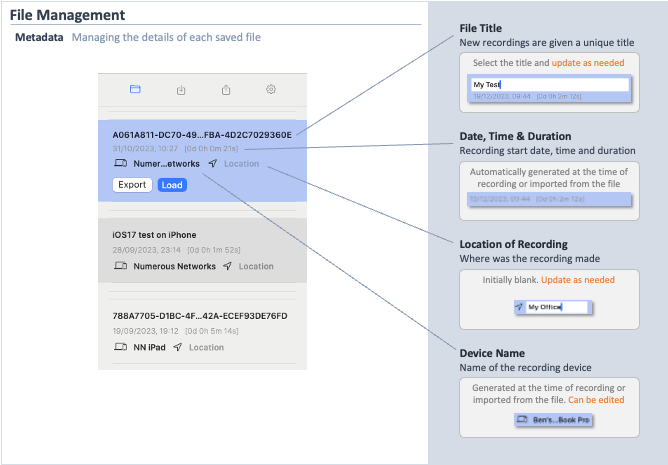
Metadata
Metadata is an important way to manage your recordings, allowing you to create memorable titles and additional information about the location of the recording.
The recording device is automatically generated from the log content but can be updated if so desired.
The start date, time and total duration of the recording are auto-generated from the log file and cannot be changed.
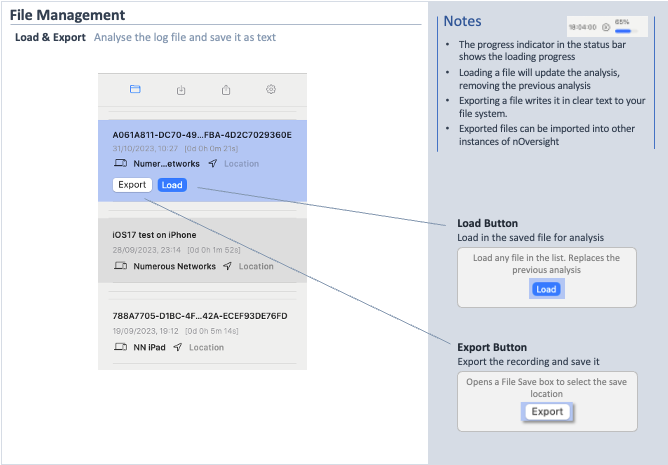
Loading & Exporting Recordings
Loading and exporting any recording saved by nOversight is managed from within the record itself.
Select a record to reveal the Export and Load buttons. The selected record turns blue
Each time a file is loaded, it will replace the current active analysis. Any unsaved data from the previous analysis will be lost.
Important. Log files captured by pressing the 'Play' button cannot be saved after they have been captured. To save a live capture you must enable recording mode first. For a refresher on setting up recording, see Stream and Record logs
Importing Recordings
To create a sysdiagnose file suitable for import, follow the instructions here: Sysdiagnose offline logs
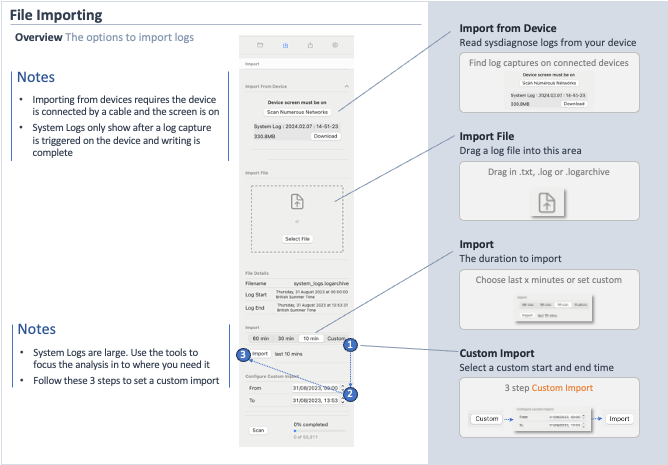
The Scan feature in the File Import provides a useful way to identify a time of interest and will be covered in the next section
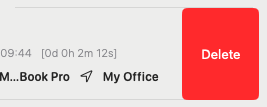
Deleting Recordings
Recordings can be deleted with a simple left swipe
Last updated